My approach to designing tatting
I have taken several approaches when designing tatting.
In the early days, it was a pen & paper method where I made sketches of the designs, just a few rings and chains and test-tatted them. Almost all the time, I will have to make several attempts to get the stitch count right for the repeats and all that.
Another method is I just go with the flow and get it all done. This worked for small motifs. After that I would go back and do the chart. Sometimes, I just write the count on a photo of the tatting if I am sharing it on my blog or Facebook.
Most of the time I would have a polar graph paper with me which I use to make sure that the elements fall into the sections for the repeats, whether they are 4 repeats, 6 repeats or 10 repeats, etc. Polar graph papers are handy because they have concentric circles and spokes all drawn out. The circles marked the rounds, while the spokes mark the number of repeats that I want in the design.
A little later, I dabble with drawing software to draw the chart after I have completed the piece. This method has worked for me all this while, though sometimes I feel it draining trying to replicate the finished work in chart form. I am currently using Inkscape to draw the chart.
Suddenly, it dawned on me to reverse the process. Get the design done in chart form and then do the tatting. I don't believe that it is a new method, but it certainly is new-to-me since I have not tried it before.
I have already drawn a chart of a small doily that I want to try out. The next step is to determine the stitch count for each element.
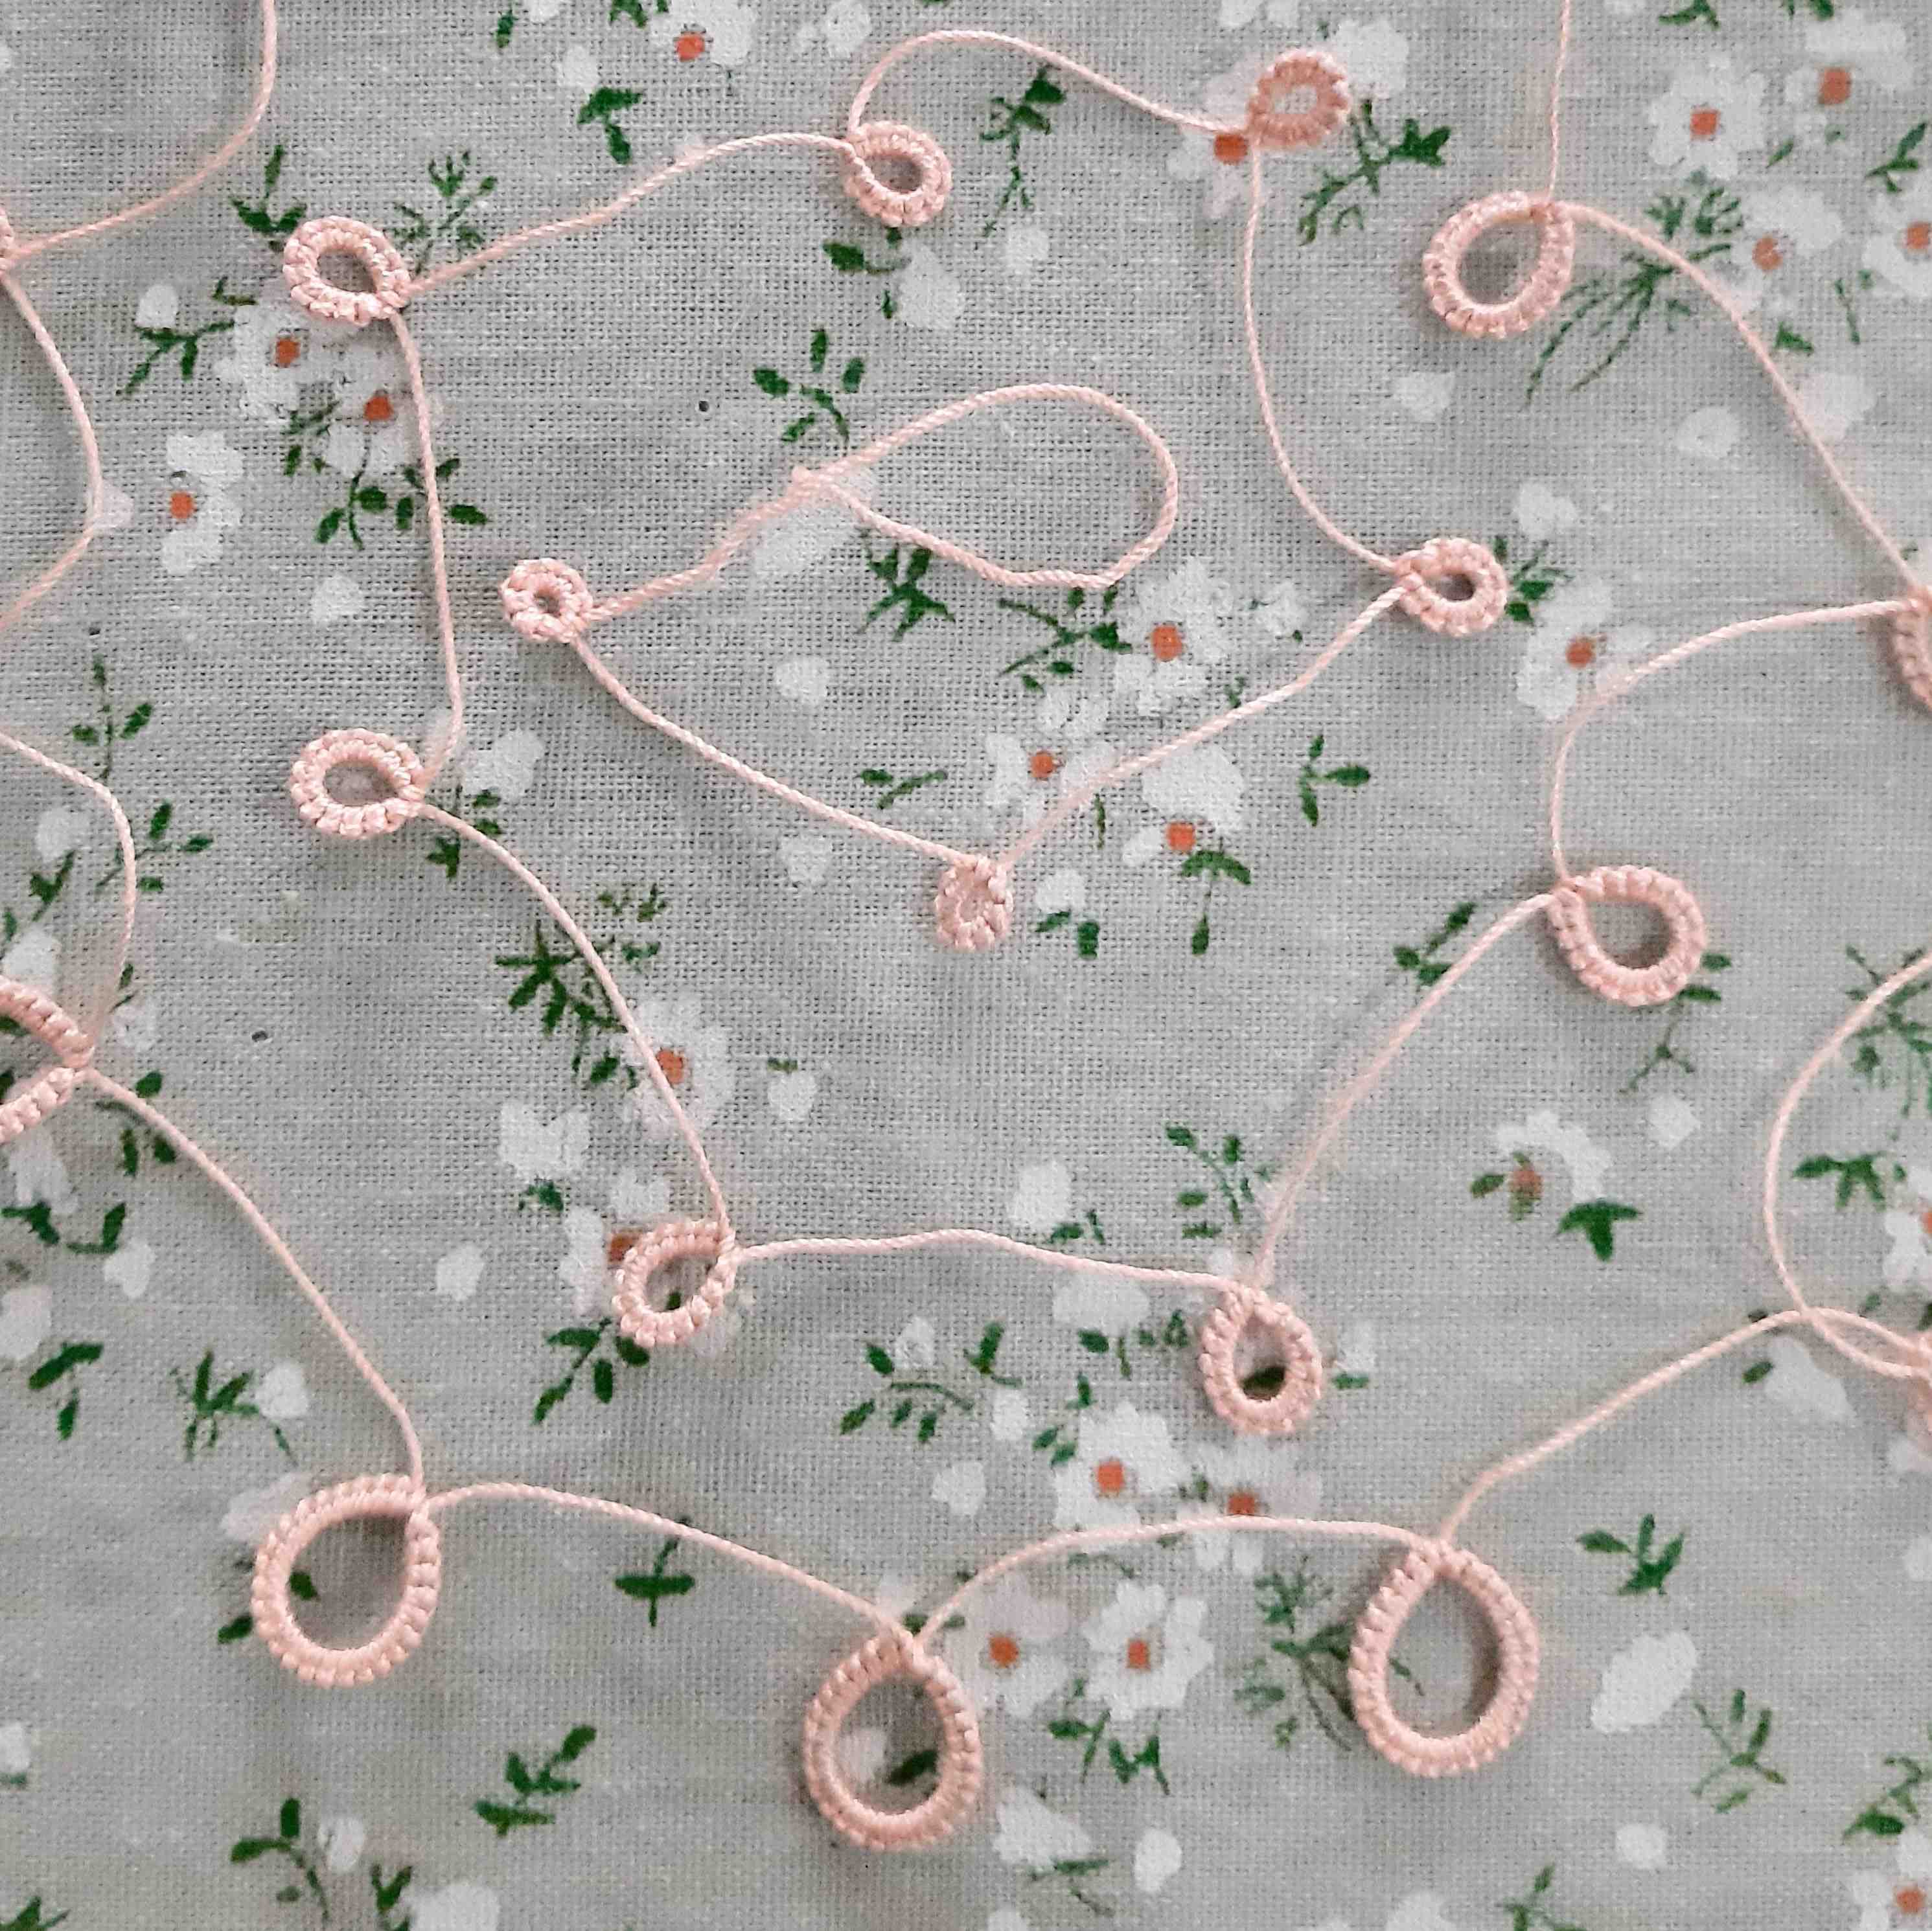
During one of the Online Tatting Classes on designing (I think), Sue Fuller mentioned that a good way to pick stitch counts is to make a template of rings of different counts. And that was what I did.


Good luck, let us know how you get on!
ReplyDeleteVery interesting!! :)
ReplyDeleteInteresting read, thank you for sharing your thoughts
ReplyDeleteI've seen the idea to make a lot of rings in various sizes to help with the stitch count. I haven't tried it, but it seems like a good idea. Good luck!
ReplyDelete