Showing posts with label 25-motif challenge. Show all posts

7 Mar 2007

A Doily Finished

I have completed the doily that I started with the motif 19/25 that I posted in the challenge earlier. I started towards the end of December and finally finished it a few days ago. The full size measures 15inches or 38cm square, made in size 20 Manuela multicolour in shades of yellow, lavendar and pink. You can' really see it in the picture.


This doily will be given away as present, to whom or for what occassion I will not say right now, until after the event. I hope the persson who will receive it will like it.

26 Feb 2007

Finishing up - mostly

Thank you for all the comments that I received upon completion of my 25-motif challenge. I am now writing up the patterns for the designs that I have made for the challenge.

I have reworked one of the motifs because the stitch count was not quite right the first time round. I think it looks better this time. I have to start over one of the bookmarks because I had given it away before I wrote out the pattern completely.


At the same time, I am working very hard to finish a table-topper that I am making with one of the doily motifs that was put up in the challenge. I added a few other smaller motifs to fill it up. I need four repeats to make a square piece and am now on the fourth one. Then there will be one final round to tie up all the motifs together. This will be given away as a gift, and I have to get it done by end of March.


I have also started on another rework, a circular lace which will be about 14 inches when done. This is the first large lace that I designed, when I took up tatting again. At that time I didn't know about split rings and split chains or even about tidying up the ends. So there are ends at every round which are all in knots. While working on this, I learned about split rings, and incorporated it into the design .
This is the first two of nine rounds. And I made some changes to the original design along the way, to make it better, hopefully. You'll see more of this as I add more rounds to it.


15 Feb 2007

No.25/25 - A Square Doily

This is it! My final entry for the 25-motif challenge, as promised a doily.

BTW, when someone say doily, I always have the image of something round or oval. Are square shapes also called doilies?

This one is different from the usual ones - it is made in rows rather than rounds.

I was playing with some ideas on this last one and a thought struck my mind. If we can have crochet blocks starting with rows as well as rounds, I'm sure we can have the same with tatting. So here it is - something that begins at the edge and worked upwards to form a square.

The first row are all split rings, and I also make use of split rings to move to the next row. When all the rows are done, I made one last round of rings and chains to soften the effects of the edges.

Hmmm ....... have to think of what to do next ........

4 Feb 2007

No. 24/25 - Doily


I'm getting closer to finish this challenge. This is the penultimate piece, one of the two doilies that I have to make before I reach the finishing line. This doily was tatted using a size 40 thread and measures 5 inches in diameter. I am finally satisfied with it after two attempts. The finished doily was a bit ruffled and needed to be blocked. But I took a shortcut and have it pressed under a thick book .... ;-)

But, if I am were to make it again, I think I will make some changes to the ds count in the chains for the last round, and maybe not have so many picots in them.

Now, off to start on the final one!

28 Jan 2007

No 23/25 - Final Bookmark


This is the last of the five bookmarks that I have 'pledged' to make for the challenge. It was made with split rings and woven long picots throughout.

I have given this bookmark away to a marvelous friend ..... in my effort to get her to tat ..... "Yeah, right! " - I know she reads my page here and can just hear her saying that!


At the beginning of the challenge, I had decided to make 5 types of tatted items:

1) Medallion or Round motifs - 1/25, 2/25, 7/25, 18/25 and 20/25 - DONE.

2) Snowflake or Star - 9/25, 11/25, 13/25, 14/25 and 21/25 - DONE.

3) Hearts - 4/25, 8/25, 12/25, 17/25 and 22/25 - DONE

4) Bookmarks - 3/25, 5/25, 10/25, 16/25 and 23/25 - DONE

5) Small Doilies - 6/25, 15/25, 19/25


Now, two more to go! I hope I can have both done by end of February. Have a design for one of them in mind already. Just neeed to get the shuttles wound up for it.

22 Jan 2007

No 22/25 - Daisy Picot Heart

Well .. it's done. I have completed the heart with the daisy picot centre, two actually, but with slightly different tip.

For the one above, I made another smaller daisy picot at the end. But I think I may have made the chains holding the daisy picot a little long.  But, I think I prefer this second one below, which has only a free ring at the end. This design is lot simpler with only one point of attraction, the daisy centre.

I think the way that Ruth made as seen on her blog is nice too.

14 Jan 2007

No 21/25 - Beaded Snowflake


This beaded snowflake is a slight variation of the Minaret Snowflake motif from the book 'Tatted Snowflakes' by Vida Sunderman.

I made this when a friend asked me to show her how to add beads to tatting. I couldn't think of a design real quick, so I picked one of the patterns from the book. The original design was done without the beads. When I was making this, I found a trick of jumping to the next round without using a split chain.

The original instructions are in two rounds, and I hates ends! I took a long look at it to figure out how to jump to the next round without cutting the threads. The thing is, I can make a split chain if the ds are pointing outwards, but in this case the chains in the first round are pointing inwards. I have not figured out how to make split chains if the ds are pointing inwards. I tired it once and end up with the thread on the wrong side for the next round.

Then it struck me! Sure! it says ... first make a ring, but I don't have to start with a ring. Instead, I started with a chain, using a paperclip to create a mock picot at the start of the chain. After I have completed five rings, I made the last chain and join it to the mock picot in the first chain. Then, I made the sixth ring of the first round as a split ring, and another split ring to start Round 2. I wonder if this works as well if the ds are pointing outwards....

12 Jan 2007

No. 20/25 - Another Chinese Coin Motif

I am feeling so good inside. Someone in the family is showing an interest in crafts. My daughter asked me to teach her how to crochet. That is what I have been doing the past few weeks. We are starting by making a small bag. It is not that difficult because it will be just a rectangular shape made up of rows and rows of half-double-crochet. Asked her whether she wants to learn tatting - she said she is not ready for tatting yet.

I started of the first row for her and she continued with the subsequent rows after that. She came back to me at the end of each row because she hasn't managed to jump to the next row yet, even after I have shown her a few times. Then, she wants a row of flowers crochetted on the lower part of the bag - she can be very demanding, this girl of mine. Have to go and figure out how to make them flowers.
In between I made this motif. This is a remake of the motif that I used for the Chinese Coin bookmark that I posted earlier (motif 16/25 - Nov 15th 06). I wanted to see how it will look with some decorative picots in it. I think it looks quite alright.
Starting to work on another heart motif. Have the picture in mind already - something with daisy picots in it, but yet to actually tat it out.

15 Dec 2006

Sharing a Pattern

No new item for the challenge today.

I just want to wish everyone Merry Xmas and Happy New Year. And since this is the time for giving I am sharing one of my patterns here. It is the beaded rings-only snowflake which I posted for the challenge a while ago. Here is the pic again.

R = ring
SR = Split ring
+ = join
^ = small picot
C = Chain
o = beaded picot
RW = reverse work
DNR = Do Not Reverse
SS = Switch Shuttle

String 43 beads onto Shuttle 1,and 7 beads onto Shuttle 2. I would normally add a few beads extra, just to be safe.

Sh 1:
R1(4 o 4^4 o 4) cl R, DNR

The next step between (* - * )describes the self-closing-mock-ring (SCMR)
(*) Using Shuttle 2;
- C(4 o 2), SS
- R2(5 o 5), cl R and SS
- C(2 o 2), SS
- R3(5 o 5), cl R and SS
- C(2 o 2), SS
- R4(5 o 5) cl R and SS
- C(2 o 4) (*)
Close the SCMR
Sh 1:
SR5(4 o 4/4 o 4)
Repeat (* -*) for the next point of the snowflake, joining R2 to picot of R4 instead of adding the bead to the picot.
Make three more repeats .

For the last repeat, join the SCMR to the to the sp of R1 to complete the motif.
Just post a note if you need explanations with the instructions; this has not been tested-out yet.

5 Dec 2006

No. 19/25 - Doily Motif


This is a motif that I will be using to make a doily or table-runner as a tat-along, together with a small group from my local tatting circle.
The base motif, the daisy is made using one shuttle. I started out with the idea of making a circular doily, but when I joined up the daisies together and then joined it up with the rings and chains, it looked better as a square.
Now I am contemplating whether to stick with this square and join up more of it together. Or expanding it with more rounds but sticking with the square shape; but I can't seem to get new ideas to fit into the design.
I wonder whether this is common. You know, somehow you manage to come up with a design that you are very satisfied with and can't seem to go any further with it.

29 Nov 2006

No. 18/25 - A Medallion


Another motif to add to the challenge. This medallion has centre rings that come out from SCMRs that form the centre ring in the clovers.
I tried making another one without the centre rings, because I felt that it looked crowded with the rings in it. But I couldn't make the circle with the same number of rings. It somehow needed more than 12 repeats, so I abandoned it. I couldn't figure out why!

20 Nov 2006

No.17/25 - One-Shuttle Heart


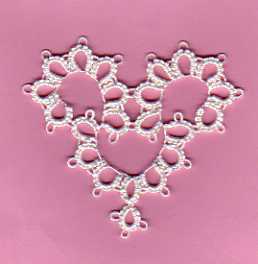
I was twiddling with my shuttle which has some thread in it, contemplating what to make with the balance of the thread, and came up with this small heart.
It is made with one shuttle, and that include the split ring which is holding the free ring at the tip. I learned the technique of one-shuttle split ring in one of Georgia's Online classes when we discussed Martha Ess' Wheel Bookmark.
If you look carefully you might see Mickey Mouse in there somewhere, LOL!

15 Nov 2006

No. 16/25 - An Oriental Touch

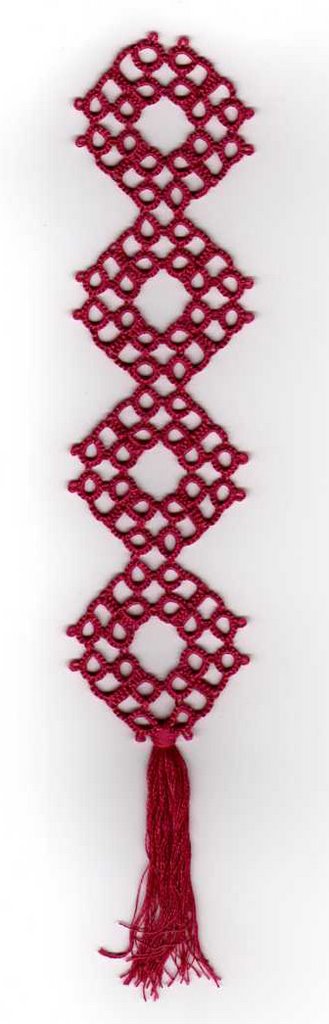
When I completed this bookmark, I thought that the round motif looked like a Chinese coin, the type with a square hole in the centre - hence the name.

This was done with three strand DMC embroidery thread. The motif can be made individually, which allows it to be worked in more that one colour. Or, in a continous flow.

If making in one colour, the whole length of 8 yds of thread (in 3 strands) loads two shuttles enough for one piece, with some leftover to make the tassle at the end.

4 Nov 2006

No. 15/25 - An Attempt with Mignonette Style


I have put on hold my attempt of the motif with the onion ring join (because I am still not satisfied with the way it turned out), and instead worked on this one.

This is my first attempt with this mignonette style. I find this to be an interesting style working with one shuttle, though in this case, it was not entirely done with one shuttle. I used two shuttles to make the 6-pt star in the centre. The other rounds were made using one shuttle, though I maintained the two shuttles throughout, just for the convenience of jumping to the next round without having to cut the thread.

I also made the mistake of not properly gauging the ring size of the motif for the last round, and ended with a fuller last round. I have not blocked the doily when I scanned this, and I think you can see the rings being squished together a bit when pressed by the scanner cover.

However, all things considered, I am quite happy with this one.

20 Oct 2006

No 14/25 - Daisy Star


This is what I managed to some up with last night, using the daisy picot instructions that Riet had given earlier. Thank you again Riet.

I am not really happy with it, I think it can be better. There are some uneveness in the size of the daisy picots which hopefully with improve with lots more practise. Also, since I am using two colours, there are lots of SLTs taking place which I think was not very neatly done. They may be quite obvious to some. Hey ... it was approaching midnight and I was still working on this! ... excuses, .. excuses :-)


October 30, 2006

I said I was not happy with my first attempt of the design using daisy picots, so I made it again. I think it looked better the 2nd time round. I have also modified the steps so that I have less SLT to make. Here it is in comparison to the 1st attempt.

15 Oct 2006

No. 13/25 - Rings-Only Snowflake


.... well .. they all look like rings!

A beaded snowflake this time, made using the techniques of self-closing mock ring and split rings. Not sure whether I may have gone a bit too much with the beads though. It looks rather crowded - if you know what I mean.

This is a small piece, only about 2 inches or 5.5 cm across.

17 October, 06
Thank you to for commenting on my snowflake.

In response to your queries, this was tatted with Flora size 20 - don't know the beads size (not very good on that one, as long as I can fit the thread in, it's okay with me, LOL). And, I agree with Hope that it would look really nice in icy blue

I have not written up the instructions for this yet. It will have to be another visual pattern I guess, because I don't know the notation for SCMR.

10 Oct 2006

Pattern for the Blue Heart

Thank you for your comments on my blue Heart design. And to be asked for the pattern is another compliment indeed. So, I am drawing up a pattern here for anyone who is interested, esp Donna. But I must warn you that this is the first time that I am putting up a visual pattern, drawn on a PC. Please excuse me if there are parts that may not come out right. I will try to clarify any points that you are not sure of.


Each daisy is made up of five rings with this count (3-4-4-3), and the next ring is (3+4-4-3) joined to the last picot of the previous ring.
The outline of the heart is made up of chains, shuttle-joined to the picots on the rings that are pointing outwards.
The numbers along the chains indicate the number of picots in the chain seperated by two ds and each chain section starts with one ds, i.e. 7 means (1-2-2-2-2-2-2-1). This count is repeated for the other half of the heart.

And, for the joining of the daisies, you may have to refer to tha actual photo, because I couldn't draw the daisies that well to show where they join to each other.

11 October, 06

Some clarification about the pattern above.
1. The heart is made in two rounds, Rnd 1 is making all the daisies and Rnd 2 is making the chains around it.
2. To make using the split ring method, start with the daisy in the middle, work up and around in clockwise direction, joining the daisies as you go. the final daisy is joined to the second daisy made.
3. To make the chain, join the thread to the shared picot (between two rings) in the top middle daisy, and work round it clockwise.

I hope this is clearer now.


9 Oct 2006

No. 12/25 - The Heart is Blue


I got the idea for this from Barbara, when she mentioned that she uses the leftover threads on her shuttle to make the centres of motifs that she is planning to do next or in the near future.

This heart is made out of daisies joined together to form the heart-shape. It can be made entirely with split-rings as I have made here or individually, as and when there is some balance of the thread in the shuttle. The outline is made of chains, joining all the outer picots to emphasise the shape of the heart.

Then again, if I had done it in red or variegated red, it could easily be a strawberry!

30 Sept 2006

No. 11/25 - 7-point 'Wiggly'


I am calling my 11th motif the Wiggly, so because of the effects in the chains. I got the idea for it after looking at Mark's motifs using the lockstitch chain (LSC). The wiggly chain is basically a sequence of lockstitches, made up of two ds with a picot in between.

22 Sept 2006

No. 10/25 - Green and Red Bookmark


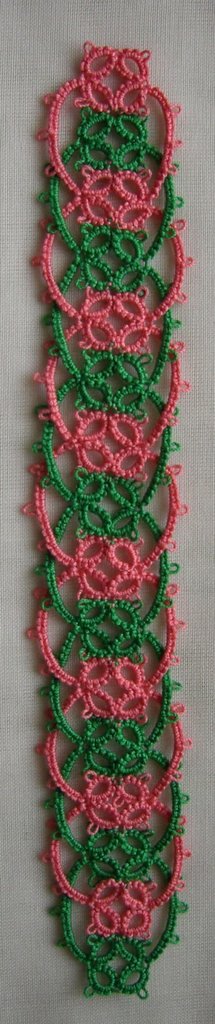
My latest entry to the challenge - another bookmark, also in two colours.

I had planned to put another round to it, that is why the picots on the outer chains are as they are. When I finished it, I kept looking at it for a while, wondering what design I should make for the outer round. Made a few tries but it caused the bookmark to be wider that I would have liked it to be.

In the end I just left it as it is. If I had not planned for another round, I could have made the picots larger and more decorative. Maybe it will not be the end. I will keep looking at it and see if new ideas pop up.

If I put two black dots at the top and a point at the bottom, it might look like a caterpillar - just a thought, LOL.

Muskaan M's DAL (Design Along)

I accepted the challenge by Muskaan M inviting tatters to join her Design Along (DAL) where she posted the design for the first two rounds a...

Many liked this from earlier