5 Sept 2026

Muskaan M's DAL (Design Along)

I accepted the challenge by Muskaan M inviting tatters to join her Design Along (DAL) where she posted the design for the first two rounds and we are to continue from there with our own designs.

You can read all about it in her blog here, https://tipsaroundthehome.blogspot.com/

This is my contribution to the DAL.


(I should learn to take better photos of my tatting)

The chart below.


The first two rounds in light pink are Muskaan's. You can get a clearer instructions of the two rounds from Muskaan's blog (link given above).

I have added the third round, in blue. The third round is worked with two shuttles.


30 Nov 2023

Blog Update

 Hello tatters who have been following this blog.

After much thought, I have decided to reactivate this blog with some changes made to it.

From now on, I will use this blog only to share my free tatting patterns.

(All other posts that are already here will remain for now but any new blog posts will be about my free patterns).

If you would still like to follow my tatting adventures and stories, you can find me here,

https://www.facebook.com/tatarenda.my or https://www.facebook.com/jon.yusoff3

Thank you and Happy Tatting.


22 Jul 2023

"Adalia"


 This is the third try and final result of the project that I started earlier. This is a one-pass design, i.e. the tatting was not in rounds but instead done in one go, moving in from the point, down to the middle and out again, completing each point one by one.

(Read here, https://tatsaway.blogspot.com/2023/07/still-tatting-but-was-distracted.html)

All I can say is that it was not an easy tat. It took me three tries to get this done. Even then there are still mistakes in this final version but they are passable mistakes that do not affect the final design.

I started in early June. 

The first attempt was to get the feel of the stitch count.

The second try was to get the construction process, i.e. to find the better way to move form one element to another in the construction.

The techniques used are basic for shuttle tatting.  What made it a difficult one for me was non-existent of symmetry in certain parts of the design .  I have to keep looking back at the previous parts to see what the next element is. I had to make sure that the shuttles are in the correct working position after each turn, reverse work or flip.

I am not even sure how to write the pattern for this.  I don't feel that the diagram alone is going to be enough !

To relax my mind in between tatting, I doodled.  Here is what is on my sketchpad pad right now.  It is far from finished but the main shapes are there.  I plan to add in darker strokes and shadings, maybe.


8 Jul 2023

Still Tatting but was Distracted

Her is an update on what has happened since my last post on designing.

This is what I had drawn with Inkscape.


Then I used my rings template to tat the piece.  You can barely make out the stitch counts that I used for the prototype, which is this yellow one,

As you can see, I did not finish it. This design is a one-pass design and I needed to see its shape at full circle. Overall it looked okay, but I see that I still have to adjust it here and there. And the result of that is this one below.


You can see the revised one superimposed over the chart, after I have made the changes.  There are mistakes in a couple of places, which is why I didn't bother to hide the thread end.

I should be working on the final version of this (hopefully with no more adjustments) but was distracted by beautiful doodles that I see fly past my FB feed.  So, I just had to give that a try. 

And, these are a couple that I feel happy enough to share. The bottom piece is a WIP.  Doodling is suppose to be calming and not be rushed.  I will share again when I have completely filled it up.


5 Jun 2023

My approach to designing tatting

 I have taken several approaches when designing tatting.

In the early days, it was a pen & paper method where I made sketches of the designs, just a few rings and chains and test-tatted them.  Almost all the time, I will have to make several attempts to get the stitch count right for the repeats and all that.

Another method is I just go with the flow and get it all done. This worked for small motifs. After that I would go back and do the chart.  Sometimes, I just write the count on a photo of the tatting if I am sharing it on my blog or Facebook.

Most of the time I would have a polar graph paper with me which I use to make sure that the elements fall into the sections for the repeats, whether they are 4 repeats, 6 repeats or 10 repeats, etc. Polar graph papers are handy because they have concentric circles and spokes all drawn out. The circles  marked the rounds, while the spokes mark the number of repeats that I want in the design.

A little later, I dabble with drawing software to draw the chart after I have completed the piece.  This method has worked for me all this while, though sometimes I feel it draining trying to replicate the finished work in chart form.  I am currently using Inkscape to draw the chart.

Suddenly, it dawned on me to reverse the process. Get the design done in chart form and then do the tatting. I don't believe that it is a new method, but it certainly is new-to-me since I have not tried it before.

I have already drawn a chart of a small doily that I want to try out.  The next step is to determine the stitch count for each element.

During one of the Online Tatting Classes on designing (I think), Sue Fuller mentioned that a good way to pick stitch counts is to make a template of rings of different counts. And that was what I did.


To make it easy for me, I labelled each ring with the number of stitches it contains. The smallest ring has a count of 8 double stitches while the largest contains 30 double stitches.  I don't often design with large rings, so I may not even use more than 30.  If there is a need for that, I may consider self-closing mock rings instead.

This is how the rings template will be used together with my chart. In this case, that middle ring of the trefoil will contain 24 double stitches.

I have not done a similar template for chains.  I figure they are quite straight forward and I can measure each one on the chart as I go.

Righto then, let's see how this goes.

19 May 2023

Spring Doily 2023 Tat-Along

 A brief update on the Spring Doily, shown below after completing Rd 10.


It is getting hard to work on this because the rings are getting smaller in the next round, as you can see from the yellow that I am using for Round 11.  Those rings are mostly (5+5) with a few (6+6) in between.
I am using Olympus Fine Tatting thread for this and it working out to be like size 70.  Just have to be extra careful before closing those tiny rings.

It is never too late to join this Tat-Along by Renulek.  You can find the round by round pictorial instructions in her blog, http://renulek.blogspot.com/ 

12 Apr 2023

Spring Doily 2023 Tat-Along


 My progress on the Spring 2023 doily is as Rd 7. The tat-along can be found on Renulek's blog.

My shuttle ran out of thread so, I took the opportunity to take a photo of it before reloading the shuttle.

I am using Olympus thread for this, the fine thread.  There is no size number on it but it feels like size 70 or 80.

My Flowers of Spring (Ruth Scharf) project has not progressed much either.  I am making the leaves first and joining the flowers later.  I find it easier to manage doing that way, rather than joining up as I go.

31 Mar 2023

Remnant Squares

The squares that I posted earlier in this post have grown slightly bigger.


I am using remnants of size 20 thread for this.  I don't often use size 20, preferring size 40 instead.  There are a couple of remnant balls if size 20 which I may use.  There are enough thread for maybe one shuttle-full of each ball.  I can get six or seven motifs from one shuttle-full of thread.

It might just end up as a small mat or coaster.

24 Mar 2023

Medallion from the past

 This is another past-date design.

A medallion that I designed sometime in 2017.  If it may look familiar  this was used as a centre for the Harmony doily. which came later.


2017 Snowflake

First of all, I know the name is past-date. 

I was cleaning up my files in my laptop and realised that I have not shared this snowflake pattern in my free-patterns list.  I think this was the time when my laptop had gone kaput and I stopped blogging for a while.  I am trying to catch up on things and this is one of those.


Enjoy!

18 Mar 2023

Flowers of Spring

Updates on my projects>

First the Ruth Scharf project.
Since the patterns/designs in the Ruth Scharf book does not have a name, I decided to call this project Flowers & Leaves.  This is where I am at now.


I have made 4 sets of leaves and with flowers joining the four sets together.  There are three sizes to the flowers.  I have decided to use pastel variegated thread for the smallest of the three, with 6-rings centres. I want to go for a solid colour for the largest, with an 8-rings centre that will go in the middle. Have not decided whether to use the red or the yellow for this.
I have not picked a  colour for the medium size flower that has 7-rings centre, probably also in solid colour.

The centre flower will look like this,

This tan colour is a test piece. I had to adjust the stitch for the leaves because the original stitch count is not giving me a leaf that stay flat, they bowled up pretty badly.  It follows tha, I had to adjust the counts for all the flowers as well. I feel that it still requires slight adjustments
The work is laying reasonably flat right now and would need just a bit of pressing later.

Continuing ....

I have also joined the tat-along in Renulek's blog, Spring Doily 2023.

This is after four rounds.  Round 5 has been released but I have not started on it.
Looking at it now, I am thinking of starting over, changing the colours of rounds 1 & 2 to red and yellow as in Round 4. 

Or, start a new one with a different set of colours?

11 Mar 2023

End-of-shuttle Thread

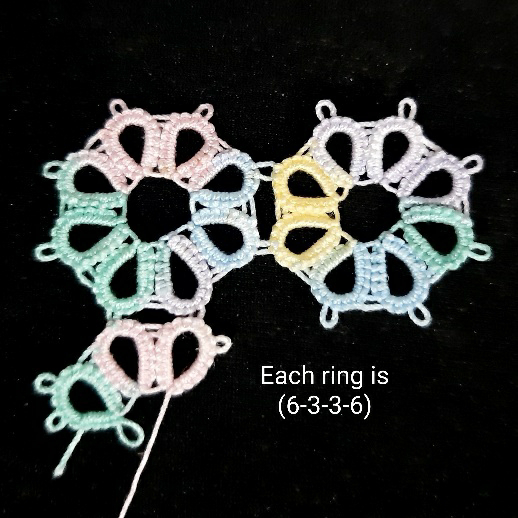
The 6-rings flower is the most frequently used motif to finish off balance if thread in a shuttle at the end of a project. Sometimes, there are remnant balls of thread that may not be enough even for a small motif.

The end result, if creating a mat,would be a six-sided round piece. 

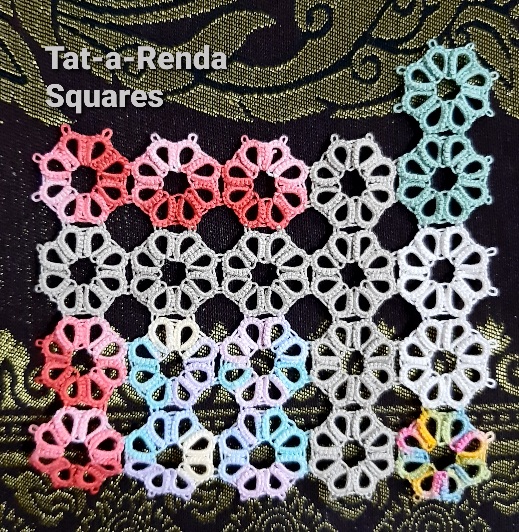
I decided to make something that will end up as a square or rectangle rather than a circular one, and came up with this 8-rings motif.
These were tatted in size 20 and each motif is about an inch in size. I plan to add more in other colours should I have projects in size 20 again.

2 Mar 2023

Flowers and Leaves

 I decided to do another Ruth Scharf project after completing Kesturi

I have tatted a Ruth Scharf design a few years ago and thought I'd give a go with another design. I picked a pattern from her second book 'Occhi - Neue Blatter', on page 30. 


This is the basic composition of the design, a set of four leaves and flower motifs surround it.  I decided to make the flowers in different colours, using threads that I have in my stash.

Below is where I am at this moment. There should be another set of four leaves at the bottom right which I am going to do next.


Aftetr the third set of leaves, I realised that it would be easier for me to do the leaves first and then make the flowers later and join them up. There will be another flower in the space in the middle of the four set of leaves, which I plan to use bright solid colour. I am thinking of deep yellow to signify the sun.

Now that understood the construction and assembly of this Ruth Scharf design, I fell  in to temptation and decided to join Renulek's Spring 2023 Tat-Along. I have completed the first two rounds and now waiting for the next part.


13 Feb 2023

Kesturi

This is an output from the abandonment of the previous project, Indahloka.

I needed something easy to close that project, so I repeated the centre of it and finished it with a series of trefoil round.


Finished size is 14cm, tatted using Olympus Gold Label (colour M12).

Here is the chart if you wish to try.  There are five rounds in all, the first four are shuttle-and-ball rounds but the fifth requires two shuttles.  If you start from the beginning with two shuttles, you can easily jump to the next round with split chains and split rings.


Enjoy, 😄

Project Abandoned

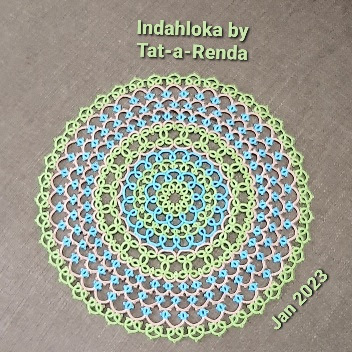
 I abandoned the project that I started earlier, the one with the blue/green/tan thread.

I decided that I didn't like it as much when I added the orange thread.


I actually finished the round but the piece didn't lay flat even after pressing.  There is some kind of rippling between the rounds.  It is not really visible in the photo but the ripples are there.

I snipped the whole orange round off.  This is how it look after I removed the orange round.


Looking at it for a while, I think I am going to leave it as it is for now.

This is an easy beginner pattern requiring shuttle-and-ball.  Maybe later,  I'll draw up the full chart.

28 Jan 2023

More on the Nameless Project

 I added a few more rows to the initial motif that I started just to empty shuttles (previous post)


All the previous rows were tatted with shuttle-and-ball.  I wanted to do something different and used split rings for the next round.

What do you think of the new colour?
I should really name this piece, for easy reference at least.  Stump for a name, though.

15 Jan 2023

Emptying shuttles .... Not.

I am at a dead end with the yellow motif so I decided to do some easy motifs to empty shuttles.
Then, I got some ideas with the blue-green motif and decided to expand on it. Instead of emptying shuttles, I had to break a new ball for this, 😁
Now, I am occupied with this one. It may be a while before I get back to the yellow one.

27 Dec 2022

Take 2.1

I started over with a solid colour, keeping to the first 3 rounds and adding a 4th.
I tried a few variations on the 4th round and snipped each off before finally getting this. 
I hope this design stays. Have to start visualising the next round.  That will take another week, I am sure, 😬

16 Dec 2022

6-point doily

While waiting for a good name to come, 6-poibt doily is the working name for this.
I am my worse critique. There are some things that I like and some not so about this doily.
Generally, I am pleased.with the design but the small bits that I think need changing are what I see staring back at me.
I am doing this again! This time in a solid colour. Hopefully, it will show up the lines and design flow better.

p.s. another point on the Blogger mobile apps. 
It only allows me to post, edit, view or delete my own posts. I can reply to comments on my posts.
I cannot read other blogs. To do that I have to open the web view on my laptop.

11 Dec 2022

Still working on ideas on this motif

I restarted the motif in my previous post and added another round to it.
Actually, not a full round; just repeated the centre motif. 
Now I am looking at ideas on how to fill the gaps between the motifs. It has to be a simple one because I don't have much of this thread left to play with.
p.s.  this post was uploaded using the Blogger apps on my mobile.

Muskaan M's DAL (Design Along)

I accepted the challenge by Muskaan M inviting tatters to join her Design Along (DAL) where she posted the design for the first two rounds a...

Many liked this from earlier