4 Dec 2022
Blogger App on mobile, anyone using it?
24 Feb 2022
Jan Stawasz Doily 1
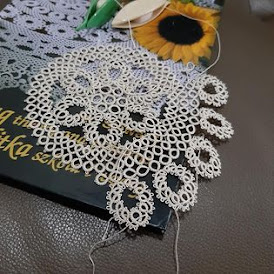
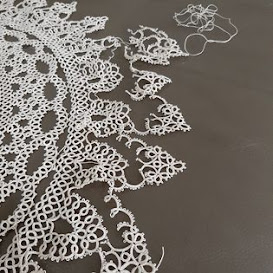
I started this doily in May 2020, during the time when the virus was beginning to rage, for want of something to to to fill the time.
There had been many ups and down for the duration of this project.
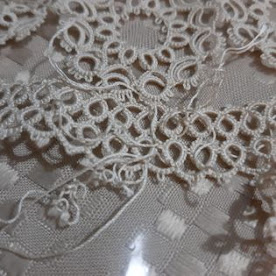
This round may look like individual motifs. I actually thought that at the beginning before starting. In fact it is actually done as a continuous round with split rings. I spent quite a long time to finish this round.
27 Nov 2021
Tis and Tat
I have been quiet on this blog though have been posting some on my Facebook page. I find it easier and faster to update my Facebook because I can do the on my phone compared to updating my blog, where I'll have to log-in on my laptop to do that.
My niece will be getting married next year, in syaa Allah. As with local traditions, there will be exchanges of dowry/gifts between the bride's and groom's family during the ceremony. I decided to make some edgings for the tray cloth for the trays that will hold the gifts. I picked a pattern by Mary Konior from her book, Tatting With Visual Patterns. I started sometime in June, needed to start early because there are seven trays in all. Finally finished tatting them in early November.
I will share pictures of the edgings when they are attached to the fabric for the tray cloth later when that is done and also how they are to be presented.
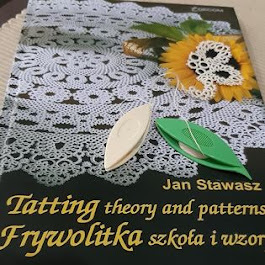
I stopped work on a Jan Stawasz project for this edgings. With the edgings done, I can go back to it. I started the JS Doily 1 from Tatting Theory and Patterns over a year ago, May 2020 to be exact. It is a no-rush kind of project, something that I don't mind putting down to work on an idea or another project. Now that I am between ideas, here is where I am with this.
1 Nov 2021
Adding new Thread in Bare Thread Tatting
I had always shy away from bare thread tatting for two reasons;
1. I always had problems with estimating the amount of bare thread space to leave at the start of each new ring; and
2. How to add new thread when the shuttle thread runs out.
I still have issues with No.1 but have conquered No.2. Sharing here is my method of adding new thread without making a knot.
Step 1
In almost all of my shuttle-only project, I tat the first ring by folding the beginning thread end and tat the first few double stitches over it. This is not a new technique. Jane Eborall shared this method in her techniques website, http://janeeborall.freeservers.com/StartRingCatchThread2.pdf
I will come back to the reason why I start this way later, but you can get the idea after going through the following steps.
And now, the reason for starting with a loop at the first ring. After I have completed the flower motif, I will draw the tail end through the loop and do as in Step 4. This way, if I need not have to add new thread midway in the motif, I will only have one end to hide as compared to two ends.
As an additional note, I also use this loop in the first ring method to add a second colour to my project without tying a knot.
I do not pull the loop completely after adding the second colour. I keep the loop visible so that I can use to 'tie-off' one end of the project (by way of Step 4), while the other end is tatted over in a chain. This method of hiding in a chain is explained by Jane Eborall, http://janeeborall.freeservers.com/HidingEndsNoKnot.pdf
By this method, I only have one end to hide at the end of my round or motif or project.
22 Oct 2021
Patchwork
I was supposed to organise the storage of my tatting and other sewing stuff but, as always there are many distractions. One of them is this mat. It surfaced among a stacked of tatting motifs and tryouts and I had hoped to get back to it later. Never did, until now, ha ha ha ...
I can't remember when I tatted this. It must have been for a bigger project that didn't happen. I know that I was working on an idea of patchwork pieces made up of several tatted motifs joined together.
Now that I found it again, I'd better share the pattern for it.
There are three parts to this mat, 2 square motifs and one border. Join up the squares until you get the mat to the size that you want. Finish it off with a border around it. I have made the bigger square in one colour, green but you can mix and match the colours to your liking.
The pattern is given as stitch counts on the motifs. This is an easy shuttle-and ball pattern. The squares does not use up much thread. It will be a good pattern to empty shuttles or use up the little remaining thread on a ball.
10 Jun 2021
Update on the Sicilian Circle, a pattern by Mary Konior
Completed Round 3 of this project from the book, Tatting in Lace by Mary Konior.
I am not really happy with this mainly because of the long chains and large rings. Had to block/press it after this round because my tension went haywire. This is one reason why I seldom do patterns with long chains and big rings.
There is only one round left, so I will finish it.
I had my first dose of the Covid vaccine a week ago. Was feeling okay on the day of the vaccination but came down with fever for the next two days. There was slight body ache and soreness in the arm where the needle went in, but I was able to do some tatting. My 2nd dose will be in 12 weeks.
Stay healthy and stay safe everyone. I know some restrictions have been removed in some countries but do continue to take precautionary measures.
23 May 2021
Sicilian Circle by Mary Konior
Each of the group of four rings in the photo above are made up of a mock ring with a trefoil sitting on it. The use of mock rings also created the pointed arches in the chains holding the mock rings.
Round 3 (photo above) also utilises mock rings but, unlike Round 2, the mock rings are on the reverse side of the chains. This is something that I had not used or made before and I find it rather interesting in terms of a designing process.
In this pattern, Mary Konior used the lock join method of creating the mock rings. I have used the self-closing mock ring (SCMR) instead for mine. I have explained the two methods early in my blog, https://tatsaway.blogspot.com/2008/05/how-to-make-mock-ring.html
A tip on how to close big rings
Round 3 contains big rings, each with 30 double stitches in it. Here is a tip on how to close big rings so that the double stitches are snugged up evenly all round.
When all the double stitches are made, I snug up the double stitches on the left side of the ring by slightly pulling the core thread. Then, I bring the beginning and the the end of the ring close together and pinch the double stitches between my thumb and my index finger. Once secured, I pull the shuttle thread slowly to close the ring.
Doing it this way ensures the the double stitches will remain flat and not twisted as the ring is closed.
Tetradill - a square motif
I was travelling in Xi'an, China and saw designs of pavement tiles that I like. This design was inspired by one of the tiles. The photo...
Many liked this from earlier
-
This doily was first posted in my Facebook page as a tat-along. Thread: Olympus Gold Special, 2 balls. Tools: Shuttle, 2 shuttles ...
-
I hope this tutorial can help beginners to shuttle tatting get the basics of tatting, i.e making the ring, chain and a join. To prepare for...